Gutenberg IDX Plugin Setup for Realtor MLS WordPress Sites
WordPress comes with a built-in page editor called Gutenberg. It's a modern, user-friendly tool that lets you build pages using blocks—like text, images, buttons, or videos. Instead of dealing with code, you simply add and arrange blocks to create your layout.
Gutenberg has been the default editor since WordPress 5.0 (released in December 2018) and works with most themes on the market. In this guide, we'll show you how to use it to add beautiful and functional MLS/IDX widgets to your site.
We'll do this by using one of Gutenberg's built-in blocks called "Custom HTML," which lets you paste in IDX code directly where you want it to appear on the page.
What You'll Get with This Integration
By following this guide, you'll be able to:
- • Show live MLS listings on your WordPress site, updated automatically through your IDX Broker feed
- • Add a fast, mobile-friendly property search form with filters, map view, and location autocomplete
- • Place listing widgets anywhere you like — on the homepage, area pages, or even in blog posts
- • Keep your site design consistent — search results and listing pages will use your theme's header and footer
- • Capture leads with built-in tools like saved searches, listing alerts, and contact forms
- • Boost your local SEO with indexable MLS content
- • Skip manual updates — IDX Broker keeps your listings current automatically
- • Avoid slowing down your site — listings are hosted on IDX Broker's servers
- • Customize the look of your widgets site-wide or individually to match your branding
- • Save $100 on setup fees by signing up through our partner link
- • Complete everything in less than 10 minutes if you already have an IDX Broker account
What You Need
To connect your site with MLS listings, you need two services working together:
IDX Broker Account – Connects your website to live MLS listings
IDX Broker is the service that pulls real-time property data from your local MLS and displays it on your site. It handles everything on the backend — hosting, syncing, and updating listings — so your website always shows accurate, up-to-date results. It also powers lead capture tools like saved searches, alerts, and contact forms.
Register here and skip the $100 setup feeIDX Plugin Account – Provides modern search forms and additional styling options
Works alongside your IDX Broker account. It adds a separate panel with ready-to-use search forms and styling tools, so your MLS listings look great and feel like a natural part of your site.
Register here for freeStep 1: Add the IDX Plugin Search Form to Your Homepage
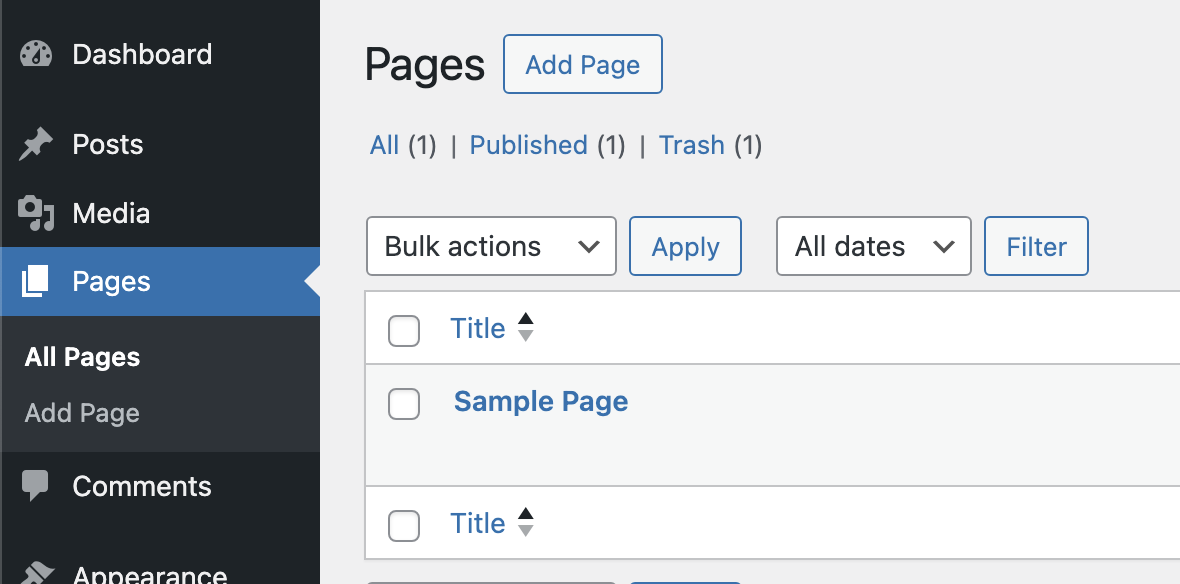
1. In your WordPress dashboard, go to Pages → All Pages. Find the page where you want to add the IDX widget, then click its title to open the editor.
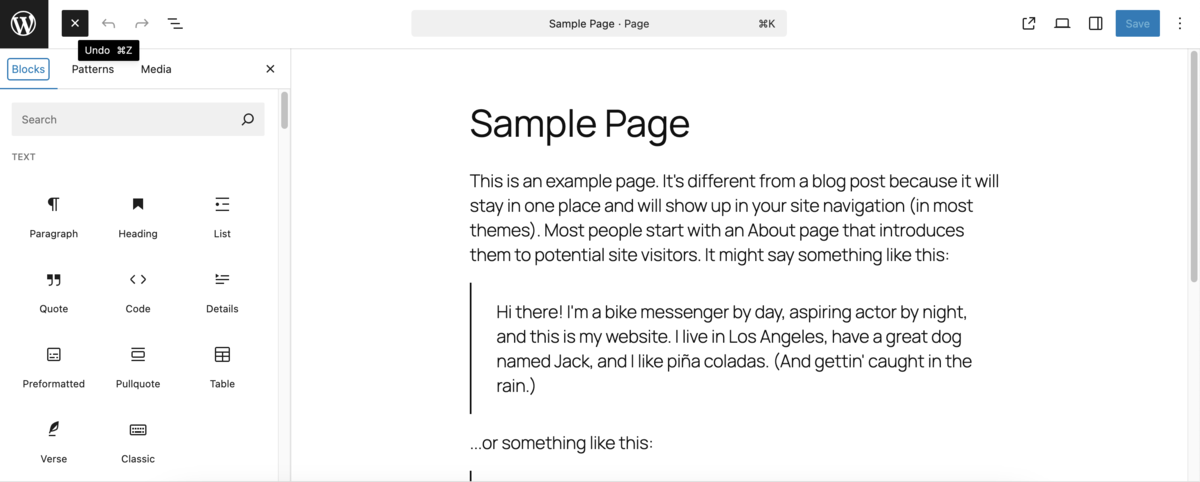
2. The page will open in the Gutenberg editor. Click the "+" icon to open the sidebar with available block types.
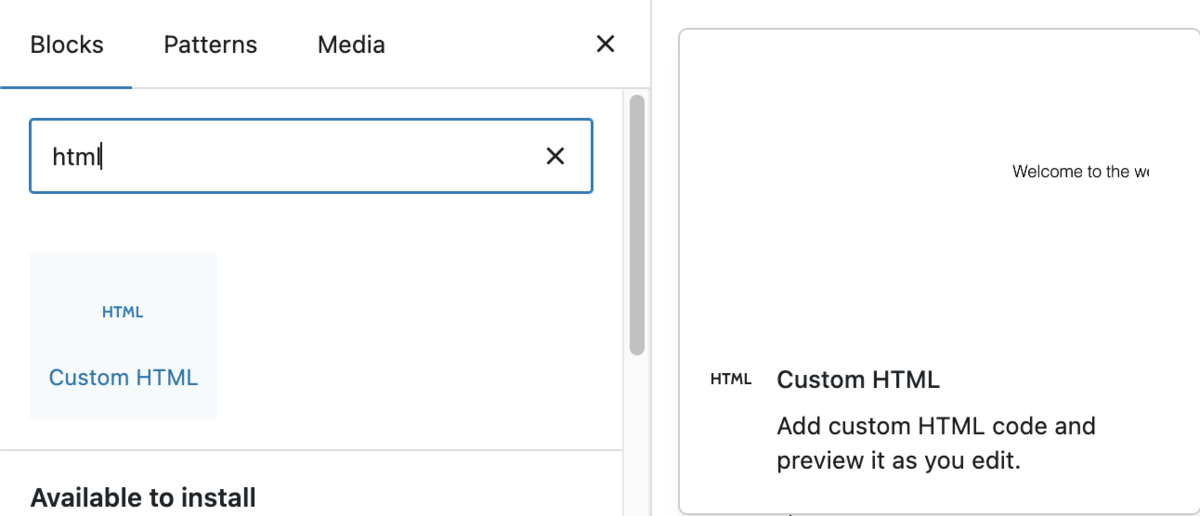
3. Search for the Custom HTML block and drag it to any spot on your page where you want it to appear.
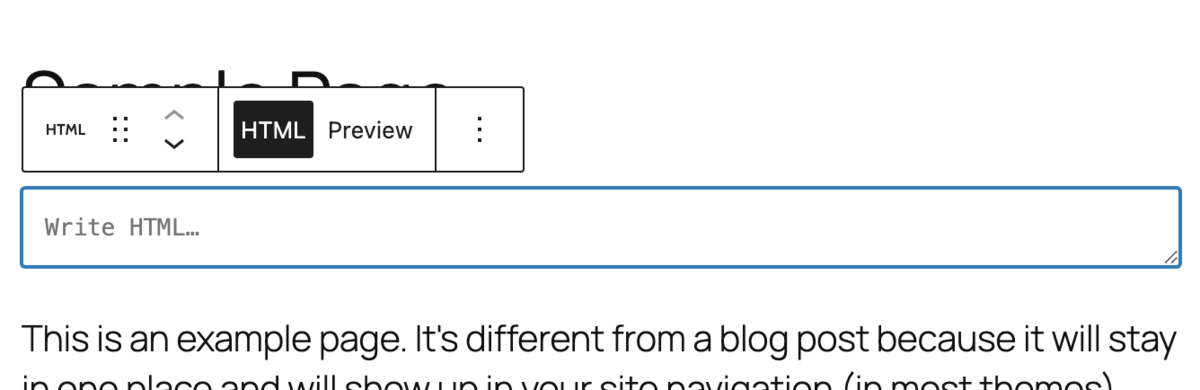
4. It should look like this
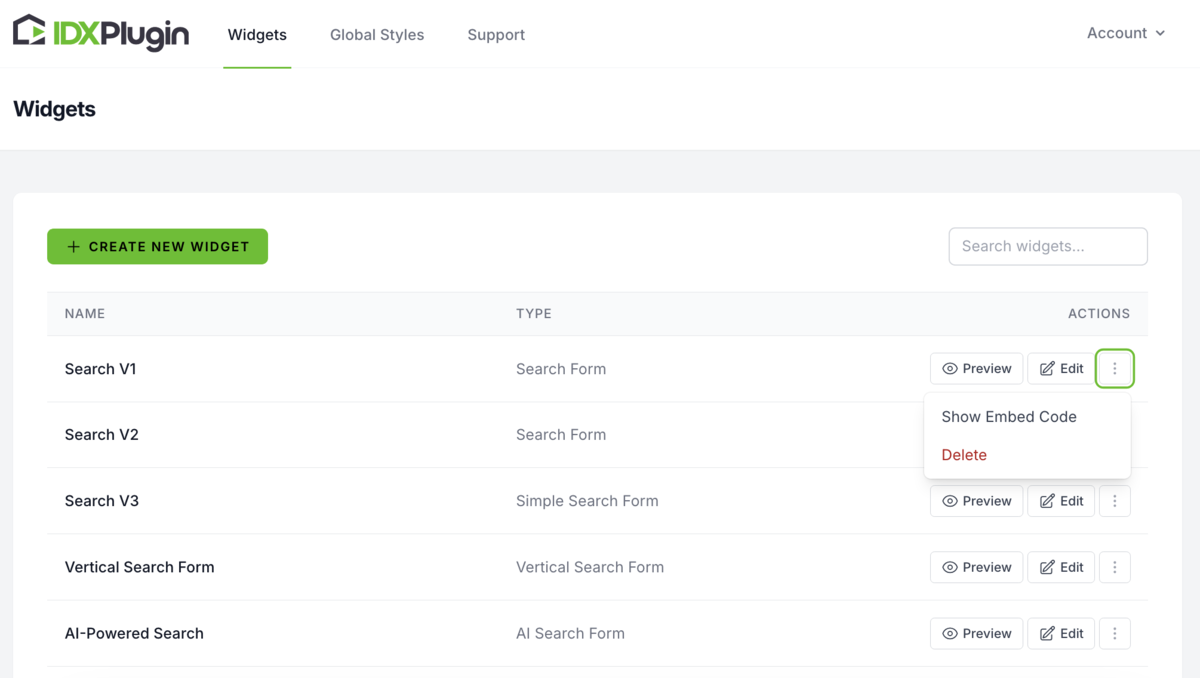
5. Go to your IDX Plugin dashboard. Here, you'll find ready-made widgets already connected to your IDX Broker account. Choose the widget you want to use — in this example, we'll use the prebuilt "Search V1." Click "Show Embed Code" to view the HTML.
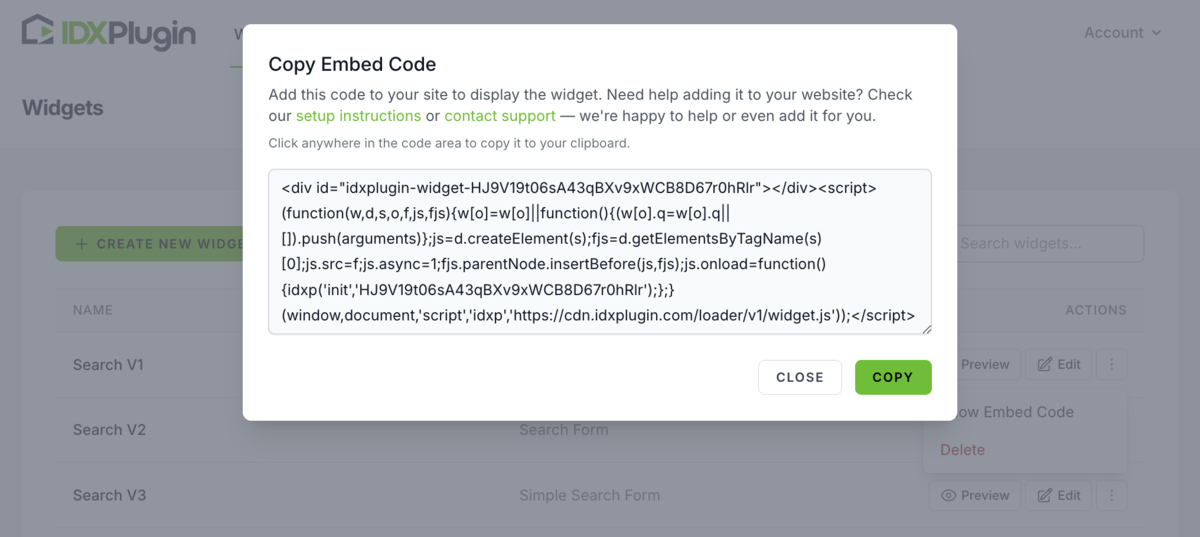
6. Copy the code from the popup window.
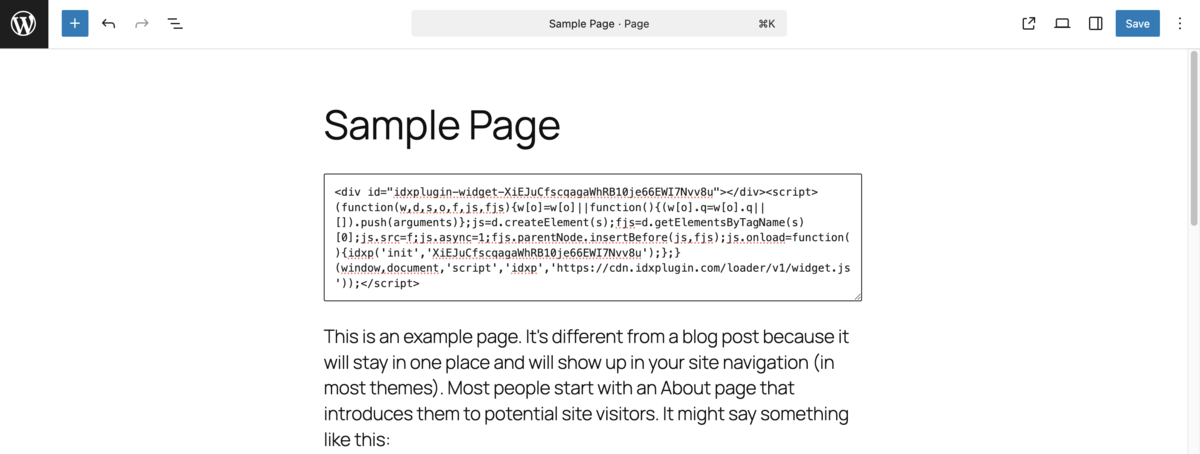
7. Next, return to your WordPress Gutenberg editor, paste the code, and save the page.
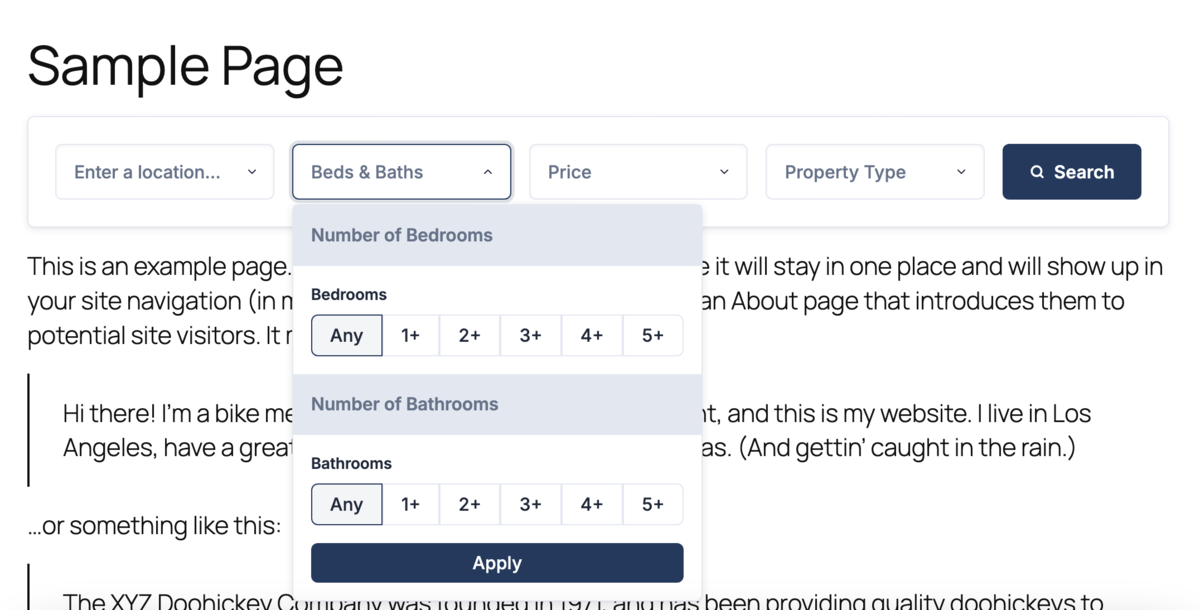
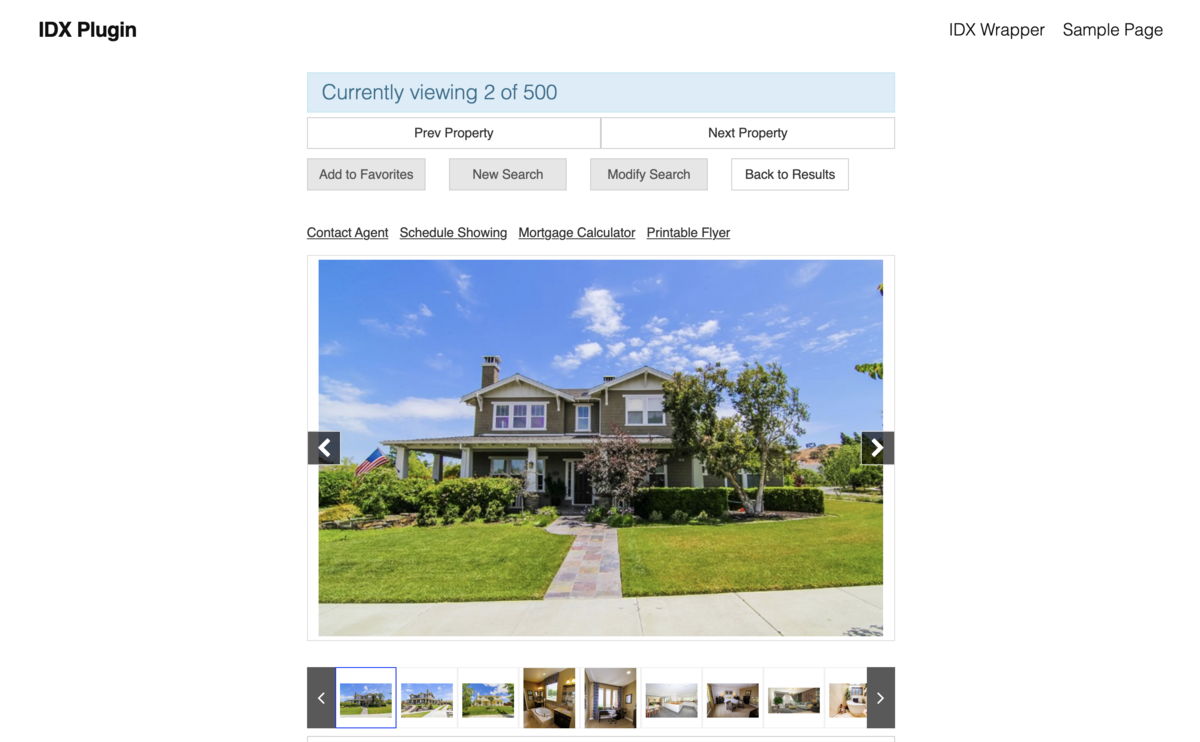
8. Visit the page URL, and you'll see the widget displaying MLS listings on your website.
Step 2: Display IDX Pages with Your Theme Using a Dynamic Wrapper
IDX Broker creates its own pages (search results, property details, lead tools). To make those pages inherit your header and footer, you'll add a dynamic wrapper:
1. Create a New Wrapper Page in WordPress
Go to the WordPress Admin Dashboard, then navigate to Pages → Add New

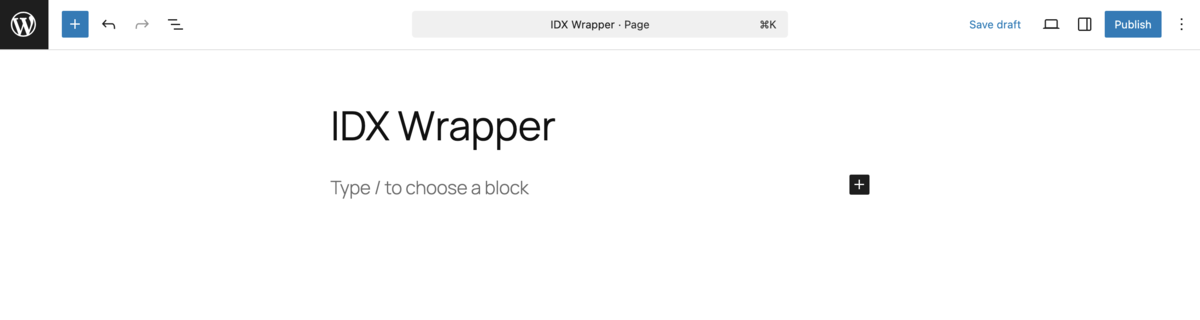
2. Name the page "IDX Wrapper" and click Publish.
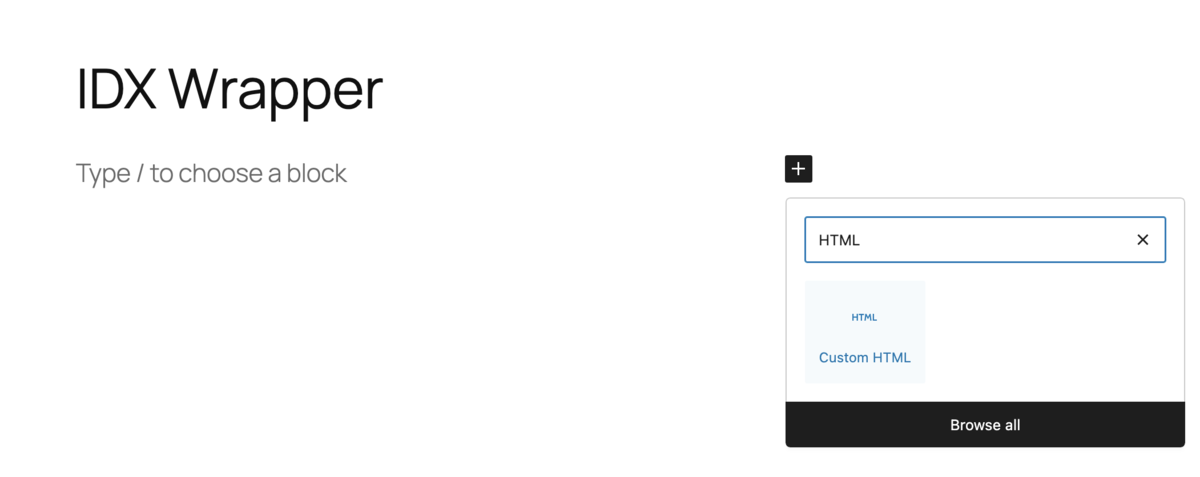
3. Click the plus icon, then type "HTML" in the search field. Select the Custom HTML block from the results to add it to the page.
4. You will see a block where you can write or paste HTML code
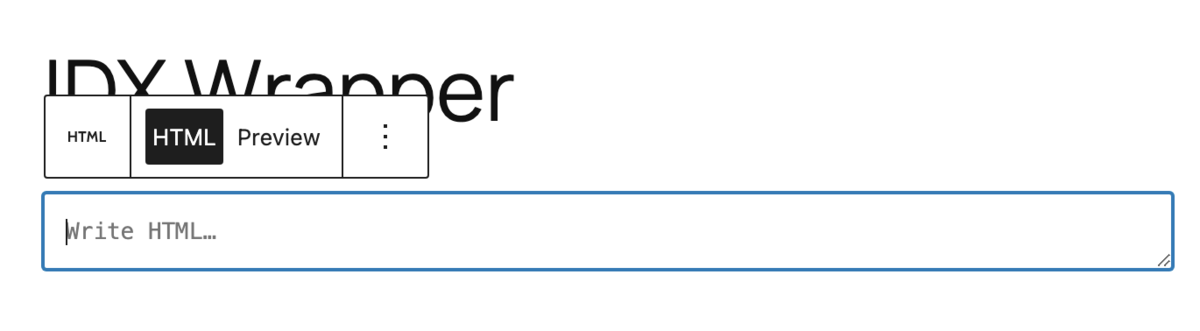
5. Copy the code below and paste it into the block
<div id="idxStop"></div>

6. In the right sidebar under Page → Template, choose a layout that hides the default title but keeps the header and footer. The name may vary depending on the theme, but it is usually clearly described. In our case, it was "Blank with Header & Footer".

7. Publish the page and copy its full URL, e.g. https://yourdomain.com/idx-wrapper
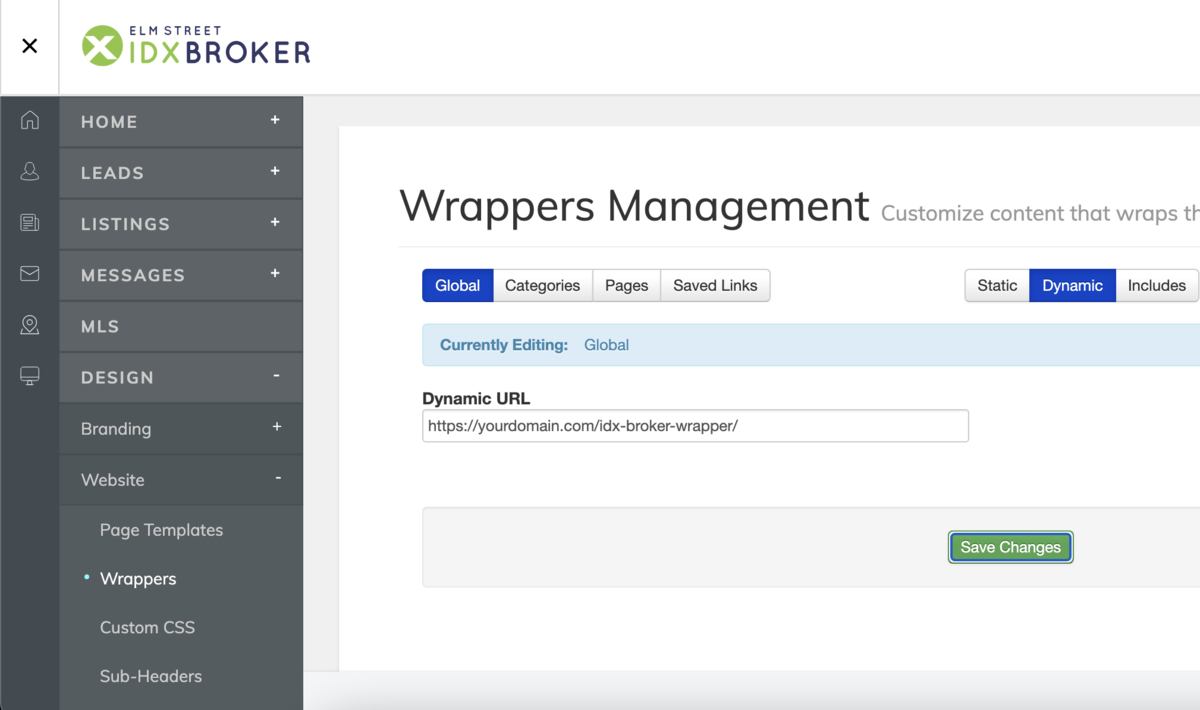
8. In IDX Broker Dashboard → Design → Website → Wrappers → Global, paste that URL into Dynamic URL and click Save Changes.
9. All IDX pages now load inside your theme, giving visitors a seamless experience.
Step 3: Adjust Widget Styles to Match Your Site
Once your IDX plugin widgets are added to your site, it's a good idea to adjust their look so they match your overall design. You can do this in two simple ways:
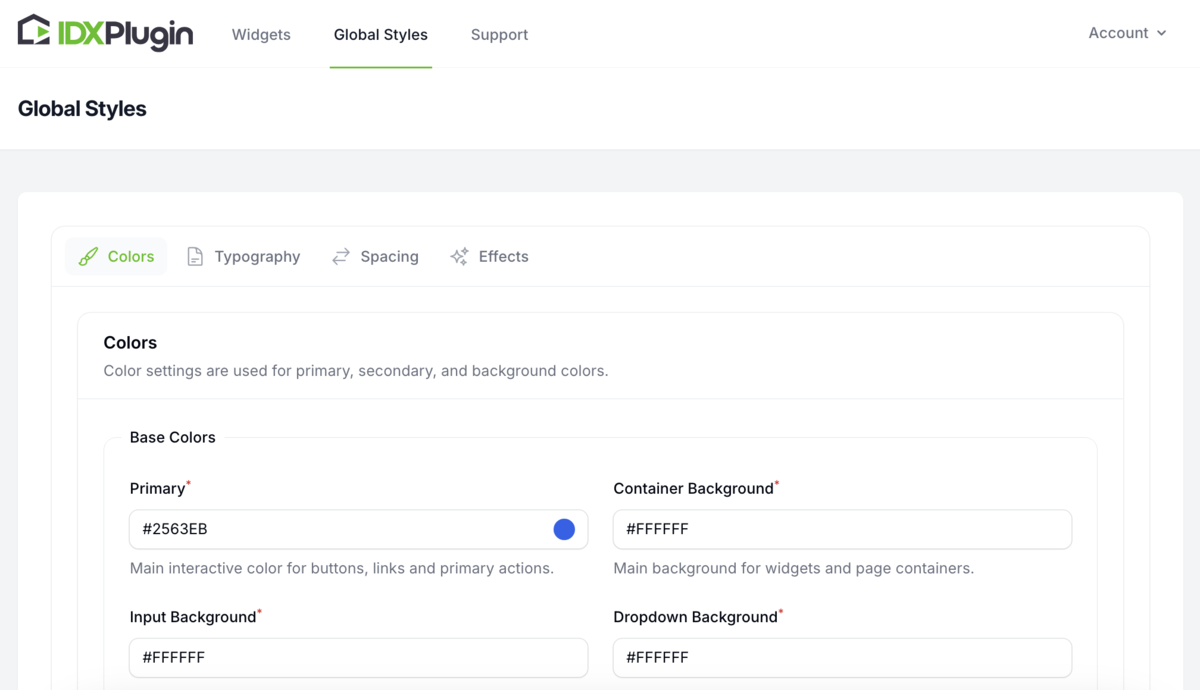
1. Global Styles
In the IDX plugin dashboard, go to Global Styles. Here you can set the main colors, fonts, button shapes, spacing, and corner radius. It's a quick way to make all widgets look consistent across your site.
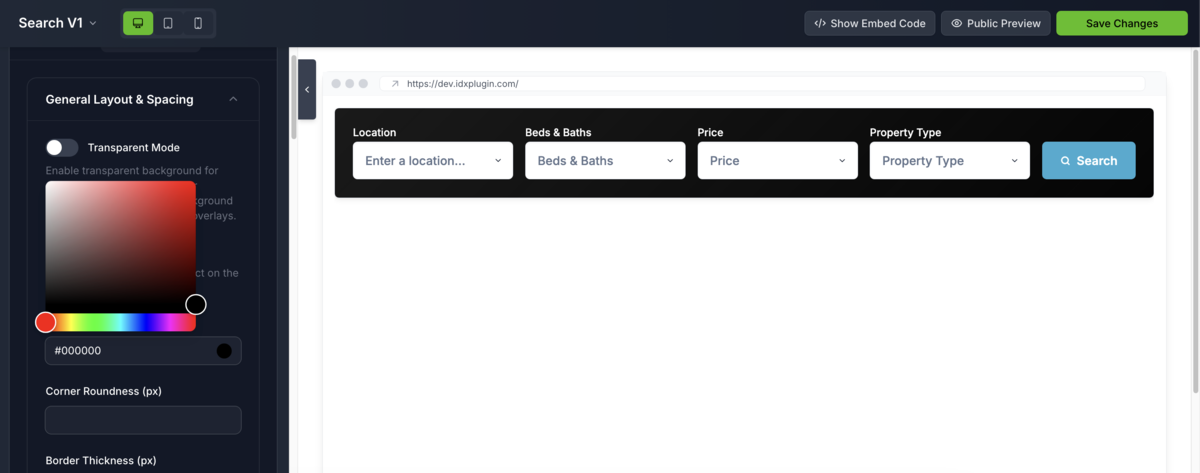
2. Styling Individual Widgets
Want to make a specific widget stand out, like the search bar on your homepage? Open that widget, go to the Appearance tab, and adjust things like background color, padding, or text size. These changes will only affect that one widget.
Ready to Get Started?
You've learned how to embed IDX Plugin widgets in Gutenberg and style them to fit your brand.
Don't have an IDX Broker account yet? Create one here and skip the $100 setup fee.
Already using IDX Broker? Register your free IDX Plugin account here and start adding widgets today.
Need help? Contact us anytime — our support team is ready!
Get Started Today
New to IDX Broker? Get the complete solution. Already have IDX? Test how our widgets work with your account in under 3 minutes.