How to Add MLS Search and Listings to Any Realtor Website (No Coding Needed)
A complete guide to connecting IDX Broker to your website and enhancing it with modern, customizable widgets
Adding live MLS listings to your real estate website is one of the most effective ways to boost functionality, increase user engagement, and generate long-term results. Not only does it improve your SEO (bringing in free, recurring traffic from Google), but it also gives you powerful tools to capture leads through built-in contact forms and registration prompts.
In this guide, you'll learn how to connect IDX Broker to virtually any website — whether you're using WordPress, Webflow, Wix, Squarespace, or a custom-built solution. We'll also show you how to enhance that integration using IDX Plugin widgets, which offer advanced user experience and visual flexibility to match your website's branding and improve the overall presentation.
What you'll need: To follow this guide, you'll need two things: an active IDX Broker account (which connects your site to MLS listings) and a free IDX Plugin account (which lets you style and display those listings with modern, customizable widgets).
Understanding the Role of IDX Broker and IDX Plugin
Before we dive into the steps, let's clarify how the two services work together:
IDX Broker
This service handles the core MLS integration. It manages the data feed from your MLS, generates the property search results and detail pages, and hosts all the listing data on its servers. Essentially, IDX Broker is the engine that powers the property search on your site, ensuring listings are always up-to-date.
IDX Plugin
IDX Plugin is an independent service offered by an official IDX Broker Developer Partner. It provides easy-to-use widgets to improve how IDX Broker content is displayed on your website. The service focuses on delivering powerful layouts, extended styling options, and a smooth user experience.
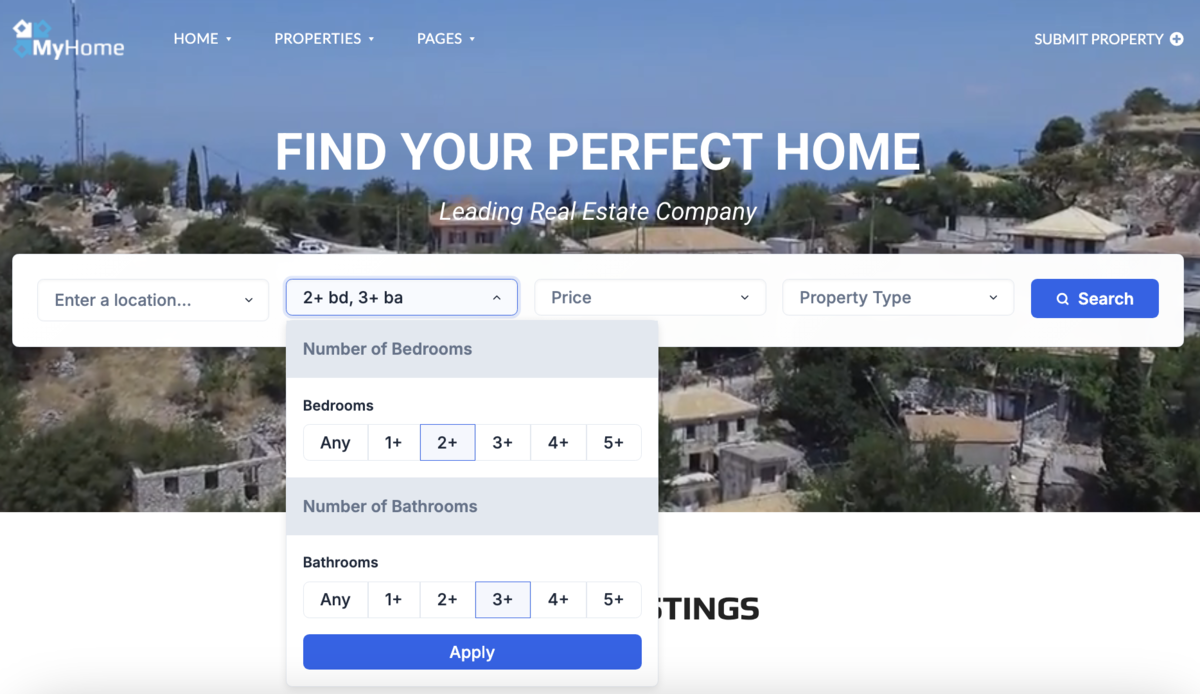
For example, IDX Plugin provides new types of search forms and visually upgraded versions of IDX Broker listing cards. One of the most popular widgets is the advanced Search Form, featuring smart location autocomplete (even with typos or partial input), combined filters for beds and baths, and user-friendly quick-select buttons.
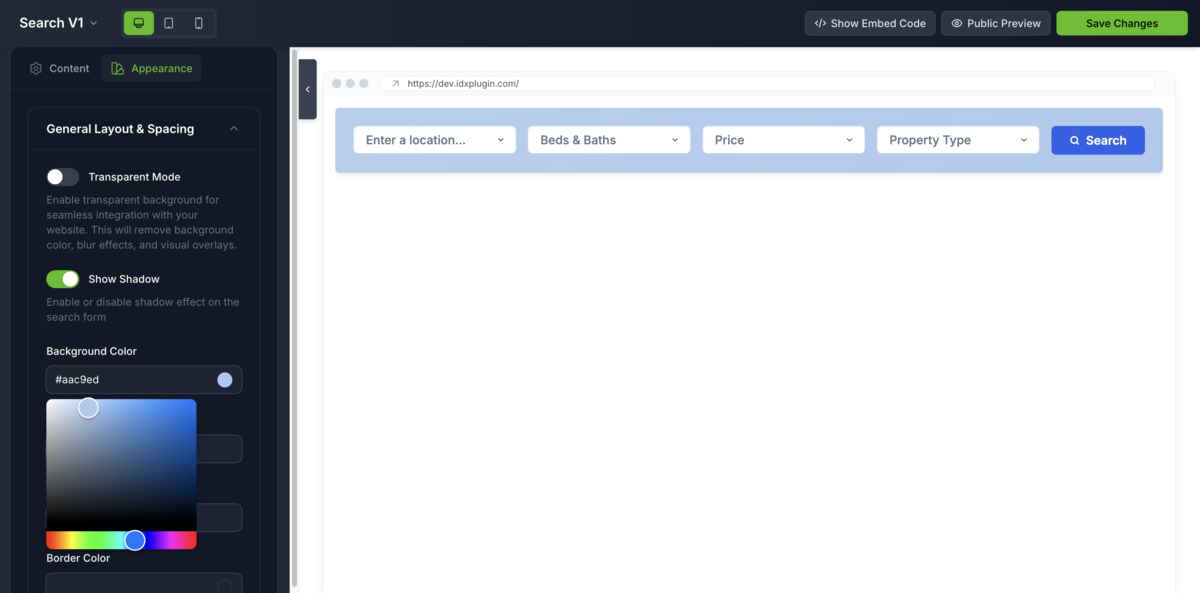
Here's a quick look at how easily widgets can be customized:
Step-by-Step Integration Process
Now, let's walk through how to integrate IDX Broker into your site and enhance it with IDX Plugin widgets. We'll cover adding a search bar, showcasing listings, and styling the widgets to match your website's design.
Step 1: Embed a Live MLS Search Form on Your Homepage
Your homepage should give users immediate access to a property search. Typically, you'll want a search form prominently in the hero section or just below it. Using IDX Plugin's Search Form widget, you can add this easily to any site:
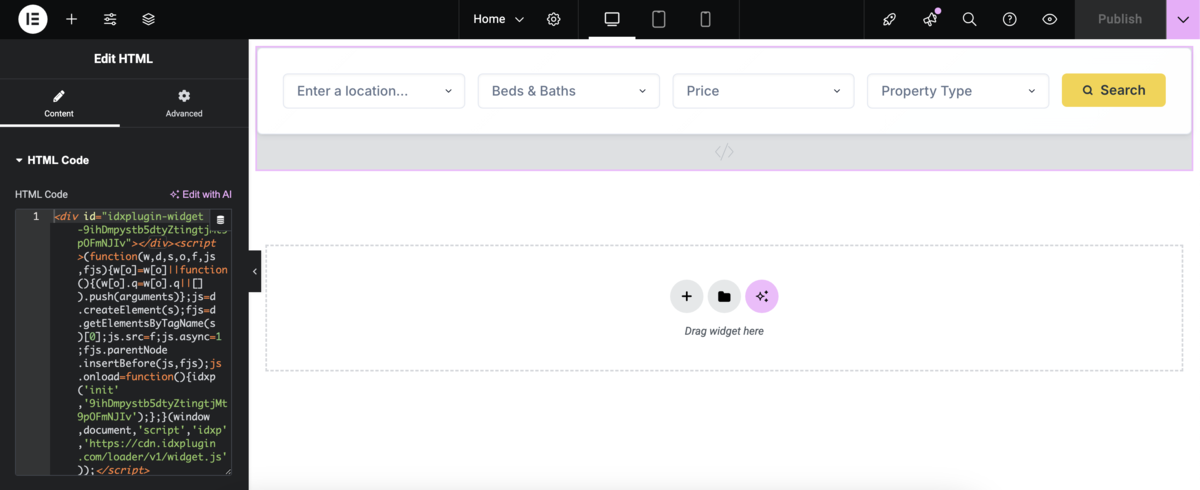
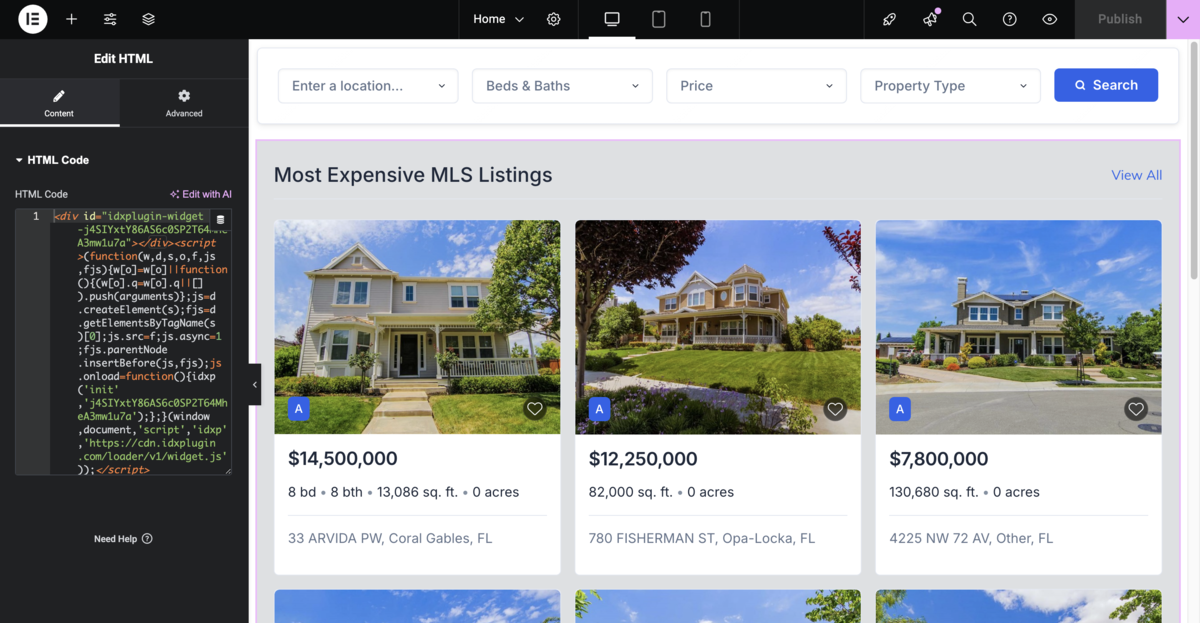
1. Add an HTML embed element to your page
Open your website's page builder (like WordPress Elementor, Wix, Squarespace, etc.) and add an element that lets you insert custom HTML. It's usually called HTML, Raw HTML, or Embed. Place it where you want the search bar to appear.
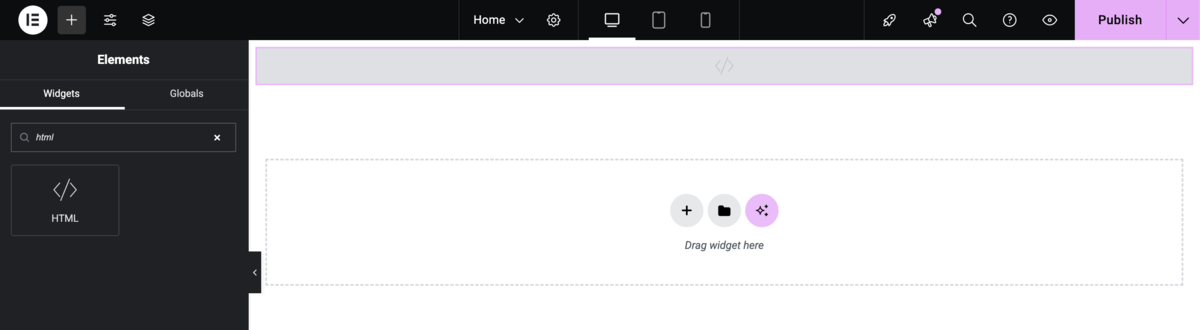
2. Get the Search Form embed code
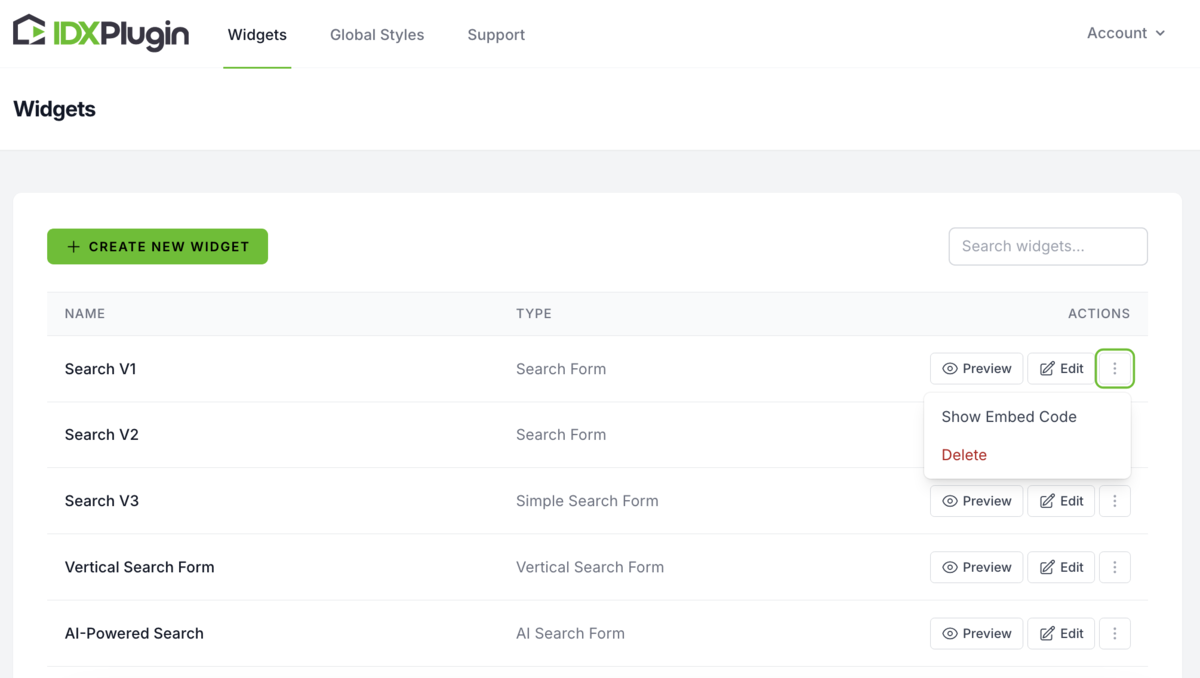
In another tab, log in to your IDX Plugin dashboard. Find the Search Form widget you'd like to use and click "Show Embed Code." A popup will appear — click Copy to save the code to your clipboard.
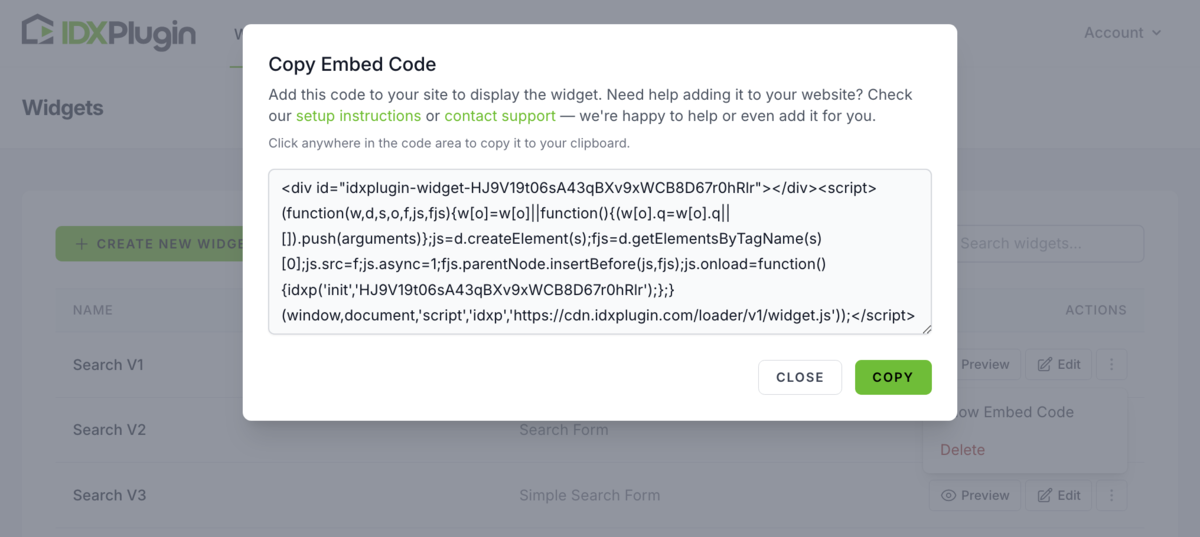
3. Embed the code on your site
Return to your page builder and paste the code into the HTML element you previously added. Then save or update the page to make it live.
Step 2: Add a Listing Showcase or Carousel
In addition to search, showcasing specific properties helps guide your visitors and highlight key listings. With IDX Plugin, you can quickly add listing grids or carousels using ready-made or custom widgets.
1. Choose a widget for your listing showcase
In your IDX Plugin dashboard, you'll find a few ready-to-use demo widgets — great for getting started fast. You can also create your own custom widgets to target specific locations, price ranges, or property types.
For this tutorial, we recommend clicking "Edit" on one of the following:
- Featured Listings List – displays a grid of your featured properties
- Featured Listings Carousel – shows featured listings in a rotating format with navigation arrows
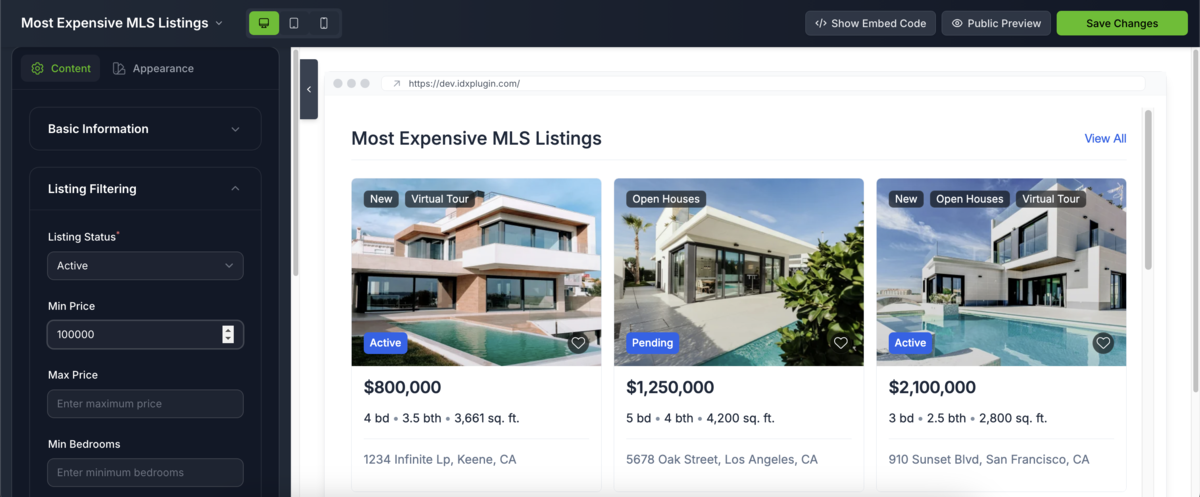
- Most Expensive MLS Listings – highlights the highest-priced listings from your MLS feed

2. Configure widget appearance and filters
In the widget settings, use the Filtering options to control which properties are shown — by location, price range, property type, and other criteria. The system offers a lot of flexibility, so take a moment to explore what fits your needs best.
3. Get the embed code
When the widget is set up the way you want, save your changes and click "Public Preview" to see how it looks with live MLS listings. If everything looks good, click "Show Embed Code" and copy the snippet — just like you did with the search form.
Step 3: Style the Widgets to Match Your Website
Once your widgets are embedded, you'll want them to blend in seamlessly with your brand. IDX Plugin makes this easy with two levels of styling:
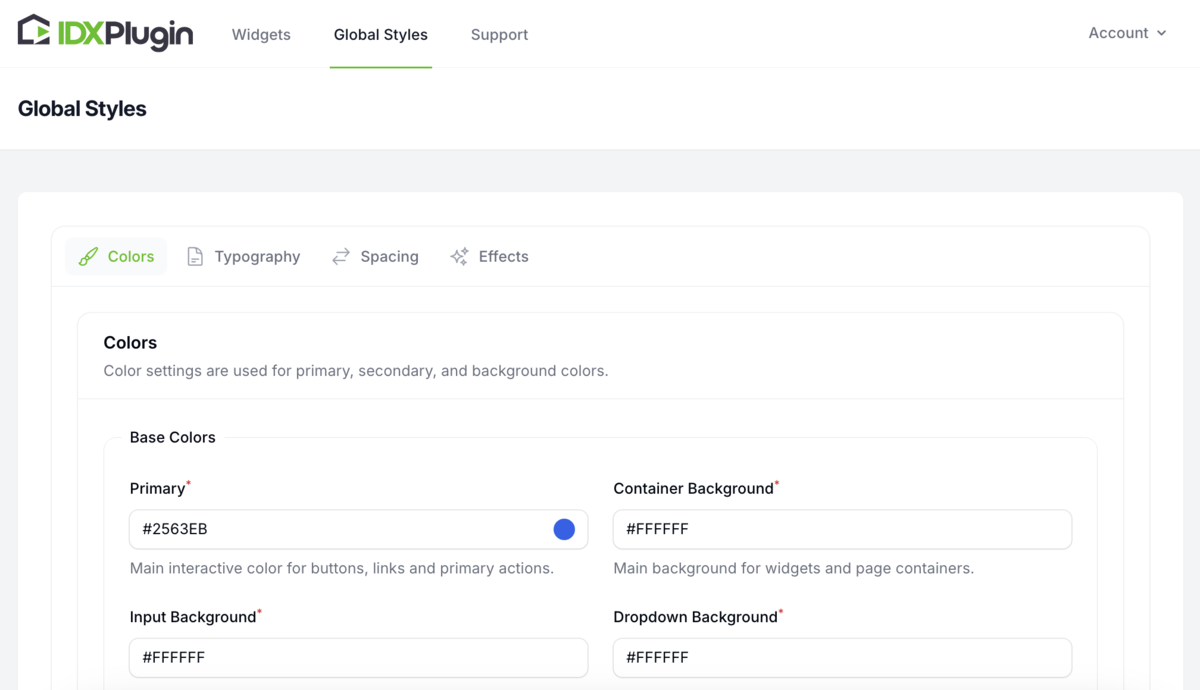
1. Global Styles
In your dashboard, go to Global Settings. Here, you can define default colors, fonts, button styles, border radius, and more — these settings will apply across all widgets, keeping everything visually consistent.
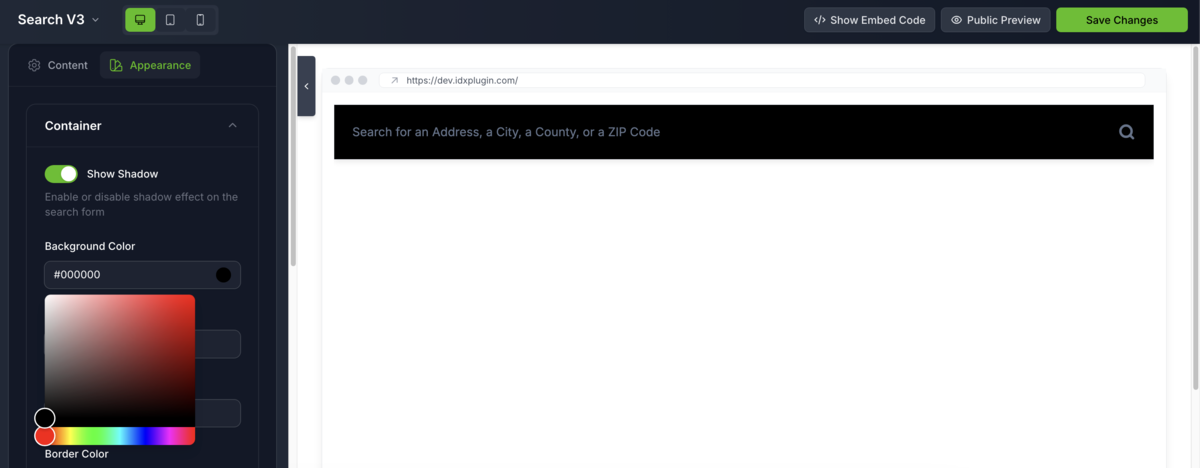
2. Per-Widget Customization
If you want one specific widget to look different (e.g., larger buttons or a unique background), you can override the global styles. Just open that widget in the dashboard, go to the Appearance tab, and make your changes. They'll apply only to that widget.
Summary: A Seamless MLS Integration for Modern Real Estate Sites
By combining IDX Broker for MLS connectivity with IDX Plugin for styling and layout, you get a flexible and future-proof solution that works on virtually any website.
Here's what you gain:
Seamless listing integration
Show up-to-date MLS listings without manual input
Automatic updates
All listings are hosted and updated via IDX Broker's servers — no burden on your site
Full control over widget design
Style everything visually, no code needed
Works on any platform
WordPress, Wix, Webflow, Squarespace — or even custom sites
This integration gives you a modern, lead-generating real estate website that looks great and performs even better.
Get Started Today
New to IDX Broker? Get the complete solution. Already have IDX? Test how our widgets work with your account in under 3 minutes.